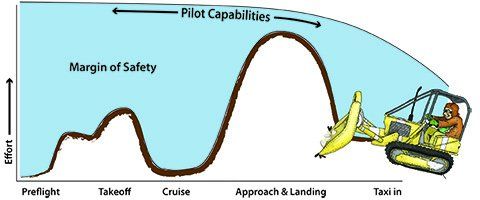
Picture one of those ubiquitous human factors graphs that show pilot workload during a flight. The x-axis shows startup through shutdown. On the y axis, is a scale of pilot workload: relatively low during taxi, a significant spike during takeoff and departure, a long, low flat line for cruise, an even bigger spike for approach and landing and an anti-climactic taper-off for taxi in. At the top of the graph, there’s an additional line that starts high and arcs slowly down representing the pilot’s capabilities.
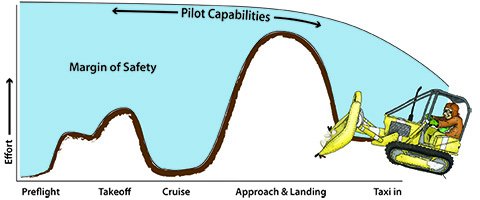
The key optic is the relatively small gap between the spikes in workload during departure and approach, and the line representing capability. These are the times when our capabilities will be most taxed.
The graph for an IFR flight where the distance flown may only require two digits is all the more alarming because there would be a whole lot of spike, and not a lot of trough. Our normally benign and comfortable stretch of cruise flight, during which we can prepare ourselves for the workload spike to come during approach, is conspicuously absent.
Ahead of the Game
The solution to combat this nefarious workload monster is trite and more threadbare than the tires on a training airplane: It’s all in the preparation. That said, many pilots don’t take “preparation” nearly as far as they could.
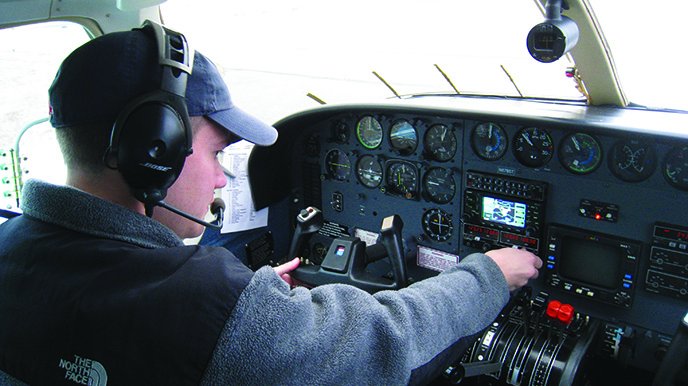
Preparation doesn’t just mean preflight. It means using every available moment when that graph is not spiking to prepare for moments when it is. Our goal as short-haul IFR pilots is to take that wildly uneven workload graph and smooth it out as much as possible—to “re-landscape” the workload graph so it consists of smooth undulations, and not long, flat stretches intermittently disrupted by jagged spikes. The first step to handling a condensed IFR flight is not some handy pointer on how to read a chart or set up your instruments; it’s simply envisioning that graph and preparing a strategy for smoothing the road ahead.
One of the errors of most workload graphs is that they begin at startup. Preflight doesn’t even make an appearance. When you allow more time for yourself to accomplish preflight planning and setup, you are essentially adding more flat area you can use to relocate workload from the tougher parts of the flight. Now the trick is to figure out what tasks you can move to earlier points in the flight process.
Concentrate of Flying
It sounds like the most obvious and inane advice to give someone preparing for a flight, but you really must plan for your departure, and the ultimate arrival, so that you can concentrate on flying the aircraft and whatever other ancillary tasks must be accomplished simultaneously, such as radio communications. In years of flight instruction, both at the airline and the general aviation level, it never ceases to amaze me how much extra stuff people give themselves to do when they can least afford to be doing it.
Here’s a question you should ask yourself next time you walk out to your airplane: Am I familiar enough with the weather and NOTAMs right now to have a rough idea of what runway I will be departing from and what taxi route I will probably use to get there? Waiting until you’re rolling is too late to do this. One good look at the departure procedures from that expected runway of departure can cue you for expected headings, clue you into obstacles in the area and may even direct you to request a different runway, if available.
What about the first five frequencies you’ll need? When departing your home airport, you may be able to tune them in without a second thought. If you’re not in that comfort zone and you don’t at least have a cheat sheet (3×5 index cards are cheap and easy) through at least your first departure frequency, you’re leaving that road ahead ungraded. How about a similar cheat sheet on the back of that index card for listing the approach frequency right down through the FBO’s Unicom for your arrival? Putting them on two sides of the same card keeps you from shuffling cards like a Vegas blackjack dealer while keeping your speed up for the SR-71 they just vectored in behind you for the ILS.
Remember, your goal is to be down to the bare essentials during high workload times: Flying, tuning, talking, and configuring. The workload spike should be a minimal speed bump.
Keeping Your Nest
If a cluttered desk is the sign of a cluttered mind, then a cluttered and disorganized cockpit is the sign of a future FAA investigation. You simply cannot have a successful and smooth short-haul IFR flight if your cockpit is not set up properly. Think of an operating room: During a critical moment in surgery, you don’t want the surgeon reaching over for a clamp and coming up with a scalpel. It’s not that your cockpit should make Martha Stewart proud, but you should be able to reach for any critical item or piece of information in one sure move.
The charts you bring into the aircraft should be laid out in order and marked up appropriately. When you go get yourself some index cards, clean the pocket change out of your car’s center console and pony up for some little, colored, sticky notes. It’s amazing how much rummaging-around time those can save. If you use NACO plates, mark off your departure and destination airports with sticky notes, and if it’s a big enough airport, mark off the airport diagram. You know what’s just as useless as the runway behind you and the altitude above you? The airport diagram hiding in your chart book.
If you have Jeppesen charts or removable NACO charts, get them out and put them in order. Put the books in a place that they’re out of the way, but reachable should you have to divert. That way you’re setting up the cockpit so everything goes smoothly, but not hanging yourself out to dry if it doesn’t.
How many altitude busts have occurred as pilots have fumbled around with en route charts looking for a frequency or Morse code ID? Probably quite a few. You know the name of the first waypoint you’re expecting, but how about its frequency and Morse code ID? If you have a GPS, you may have punched in the expected routing already, but what about alternate waypoints? Perhaps one that you hope you might get cleared to, or one that’s listed on the DP but isn’t in your clearance? Again, a well-placed sticky note on a departure procedure or en route chart containing the waypoint name in nice, big letters can replace several minutes of harried hunting with one quick glance.
If you’re using VHF nav, a note containing the frequency and Morse code ID of your first expected navaid (in readable print) can make life easier on departure. Speaking of charts, if you have a paper chart, go ahead and fold the thing up. Make it into a square. It’s easier to handle and it leaves the cockpit less cluttered. How about a little pencil-drawn arrow at the edge of the square to show you which panel on the chart is next?
The little things matter. We’re not knocking down our workload spikes with dynamite. A shovelful here and a shovelful there eventually smooths things out. When you have a long cruise section to catch up from a harried departure and set up for the next approach, that might not matter as much. But when you need to be prepping the next approach at the same time you’re leveling off for cruise and getting vectored for that approach, every minute counts.
Radio Radio
My approach set-up strategy on short-haul flights is always weather, tune/ID and brief. I use this technique because, working backwards, I don’t want to bother briefing an approach that I can’t properly certify as being in operation (through navaid checking), and I certainly don’t want to bother setting up an approach that the weather precludes me from doing.
Also, getting the weather first allows me to strategize for my approach by factoring in crosswinds, tailwinds, potential wind shear, etc. If I had my arrival ATIS dialed in prior to even taxiing, then I can begin my approach setup process simply by hitting one button while I’m flying. There’s another shovelful off of our high-workload spike, conveniently dumped into the low-workload trough of pre-taxi items.
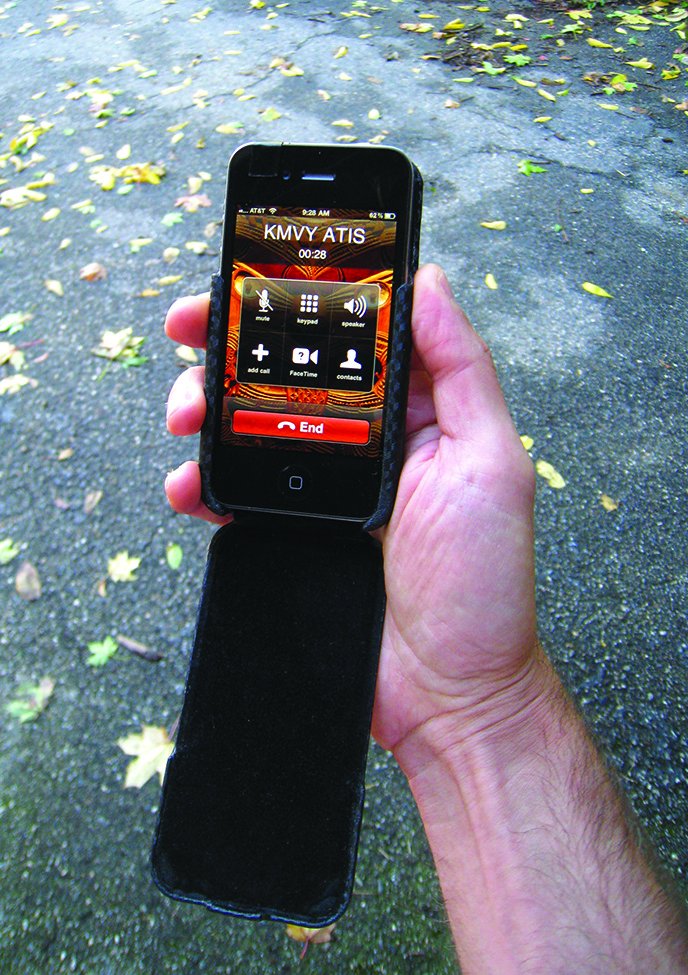
Use a little strategy with the ATIS frequencies. Once you are done listening and writing down your departure ATIS, go ahead and replace it with the frequency for the arrival ATIS at your destination and keep it in the standby channel. It’s simple, yet effective. If it’s a short enough flight, you can get the arrival ATIS by phone or computer before you leave and review the expected approach in the FBO for a good head start.
When you set up for departure, it’s always a good idea to have an approach set up back into your departure airport. This cuts back tremendously on workload if something goes wrong on departure. Don’t forget to tune and identify them (even if that’s just verifying the ID your modern navigator decoded for you) prior to leaving, as you’ll have your hands full if you have to beat a hasty return.
A second reason for setting up a return approach is to check the health of your radios. Do you ever look at your localizer as you taxi across or parallel to an ILS runway at your departure airport? I feel a lot better about launching into 1800 RVR if I’ve seen my localizer deflected correctly and the DME reading a reasonable distance from the localizer antenna as I taxi out.
Even look at the trusty ADF if you have one. I can’t count how many times I’ve tuned in the right NDB frequency and then found the ADF pointing at the local shopping mall instead of the compass locator on the ILS because the last crew deselected the ADF function on the radio in order to pick up a traffic report or baseball score. Watching the needles as you taxi out can save you from discovering this anomaly during a higher workload part of your trip.
I like to identify my navaids before I brief the approach on a short-haul flight. (If you’ve got a long cruise segment, brief the approach shortly before starting down.) This saves me from reading all about an approach that I can’t receive, and assures that my navs are tuned in while being vectored or flying the initial segment. Some flights are short enough that you’re basically on a base-leg vector right after you depart. When you’re still reviewing the plate as you join the final well outside the FAF, you’ll be glad you had all of your navs set up in advance.
That being said, apply some common sense. Localizers are highly directional and can’t be identified easily if you’re too far outside the cone of transmission. If you find yourself on a downwind for an ILS, and it feels as though you just finished your cruise checks, change things up a bit. Get your weather and tune and ID your DME (DME isn’t directional, even on a localizer) and perhaps an ADF or VOR if one is required or helpful for the approach. Do not, however, sit on your hands while you wait for the aircraft to enter the localizer’s cone of transmission, just so you can finish the ID of your navs in order. In fact, don’t sit and wait for anything if you can postpone it and get something else done first—like briefing the approach. Idle time is a liability on a short IFR flight.
It’s a Philosophy
There’s no hit list of items to make short-haul IFR flying into a cakewalk. IFR flight by its nature is a high-workload, high-concentration activity most of the time. The shorter the flight, the higher the workload, and the more concentration is required.
Knowing that our mission is to smooth out the bumps and spikes in the flight workload graph to the extent practical is half the battle. There are certain things that absolutely have to be done during those high-workload times: Controlling the aircraft, speaking with ATC, reading essential checklists, changing radio frequencies and changing aircraft configuration are time-specific tasks.
Anything else has the potential to be moved elsewhere or minimized. Remember, we’re not counting on a bulldozer to flatten out our workload spikes. We do it by addressing the little things, one shovelful at a time.
Evan Cushing is a line pilot, training airman and fleet manager for a regional airline that does a lot of short-haul IFR.
