Suppose that I am faced with an either-or situation with my autopilot. If I were told I couldn’t use the autopilot at either cruise or while being vectored and flying an approach, I’d chose to use it on approach. Sure, autopilots help relieve the tedium of long cross-country flights, but they regularly change a stressful approach into a rewarding experience. Let’s look at some general tips, then take a close look at how to get the most from your autopilot on approach.
Technique Tips
Like most of flying, rigorous adherence to technique or procedure keeps you out of trouble with your autopilot. Probably the most common mistake using an autopilot is having the wrong mode set. Say you’re at cruise using GPSS NAV mode. ATC calls, “Turn left one-zero degrees for traffic. Expect direct NEXTT.” You acknowledge and turn the heading bug 10 degrees to the left and go back to reading your newspaper.
A few minutes later ATC calls and asks if you made the turn. You begin to acknowledge in the affirmative until you notice that you forgot to change the mode to HDG; you’re still tracking the GPS course. You’ve caused a loss of separation; prepare to copy a phone number.
Here’s a trick that I devised after filling out one too many ASRS reports. Whenever you’re given a heading, first go to the mode selector and assure you’re in HDG mode. Only then do you twirl the heading bug. Do that every time, even for vector after vector. Sure, it’s a wasted second, but the routine will keep you out of trouble.
Similarly, whenever you make a change to your flight plan in the navigator, finish that with a move to the autopilot to assure you’re in the right mode. Do these the same, every time, and your chances of being in the wrong lateral mode are near zero.
What altitude do you put in the altitude preselector? The safe answer is to only select the altitude for which you’re cleared. Say you’re cruising along at 11,000 feet and you get, “Descend pilot’s discretion and maintain niner thousand.” Even if you’re not going to descend right away, put 9000 in the preselector. The autopilot will hold the current altitude until you take the steps to arm and initiate that descent.
However, never enter a planned altitude in the preselector just because you know it’s coming. You haven’t been cleared to that altitude yet, either explicitly or by clearance for a procedure, so keep yourself safe and only enter your current altitude clearance.
On Approach

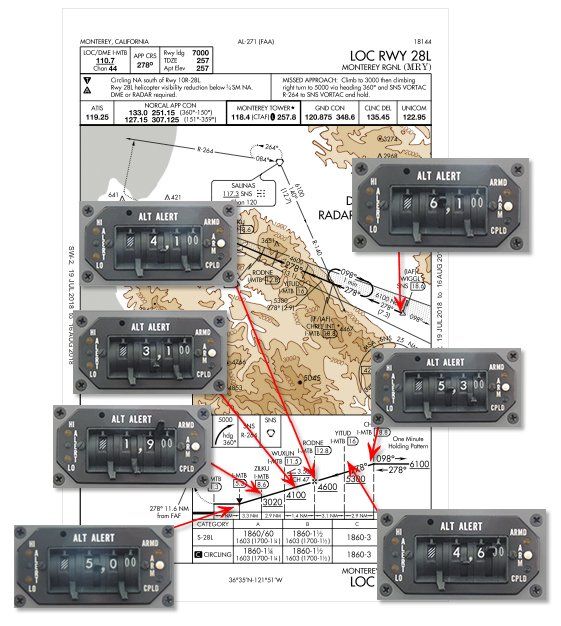
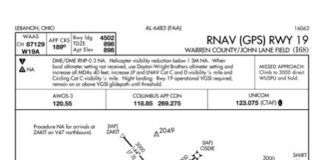
Approaches get a bit more interesting. Say you’re about 10 miles east of WIGGL (an IAF) at 12,000 feet and you hear, “Cleared direct WIGGL. Maintain niner thousand until WIGGL. Cleared for the Monterey Localizer Runway 28L approach.”
Set the preselector to 9000 now and begin your descent whenever you wish. As you cross WIGGL, regardless of your present altitude, dial in 6100 for the leg to CHRLE and begin (or continue) your descent. There are a lot of stepdown restrictions on this approach and unless you’re aggressive, chances are you won’t level off for each, but instead will pass above the restriction, allowing you then to go still lower without leveling off.
Even if you’re on a calculated descent path that clears each stepdown, dial up the leg altitude as soon as you’re crossing the fix. This way, if the winds change or something else happens and you do need to level off to make a restriction, George will. So, as you pass CHARLE, you set 5300. At YITUD you set 4600, and so on.
Here’s where you can get in trouble. Say you do level off, capturing one of the stepdowns. You’ve been conditioned to just set the next altitude because you’ve been clearing each fix with a bit to spare. Don’t forget to go through your entire sequence to initiate the descent every time you change the preselector instead of getting in the bad habit of just setting the next stepdown altitude.
Setting your missed approach altitude is a bit tricky and the technique you use will likely vary with the type of approach. On a non-precision approach to an MDA, you probably want the preselector set to the MDA. Many altitude preselectors only allow selection of hundreds of feet, not tens or ones. So you always set the lowest altitude you can that’s at or above the MDA. (In the uncommon case where a stepdown altitude is other than whole hundreds—like at ZILKU—do the same thing.)
For this approach, the MDA is 1860 feet MSL. Set 1900. Even with an MDA of 1810, don’t be tempted to use 1800; always round up. When George begins to level off, if you need those last few feet, disable any vertical mode at the least, or just turn off the whole autopilot and hand fly, but be ready to miss.
On the non-precision approach, though, as George levels off at the preselected MDA you should be reaching for the preselector to dial in the final (not initial) missed approach altitude. It’s common to forget and although it’s busy right then, trust me: It’ll get even busier if you’re trying to set the missed approach altitude on the go.
Another technique is that rather than setting the MDA, especially if you think you’ll have to hand fly to go down those last few feet anyway, instead set the missed approach altitude then and hand fly that last stepdown to MDA. If you get to MDA and want George back on the job, just select altitude hold mode and he’ll hold that MDA, even with the missed approach altitude in the preselector.
In that regard, it’s usually easier on an approach with vertical guidance. As you pass the FAF, set the missed altitude then. This works quite well because you’re descending to a decision, not to a possible level off, so you don’t need the altitude preselector set to the DA anyway.
The Miss
No matter the kind of approach and the technique you use, once you’re on the miss, you’ve got that missed approach altitude in there. Let George do the miss if you’ve got navigation for him and save yourself some stress. But, in most cases, you’ve got to at least initiate the miss yourself.
Only the very latest autopilots will remain coupled from the approach through to the miss. So, unless you’ve got one of those, it’s up to you to get the ball rolling.
If you’ve got a go-around (GA) mode, select that, usually by pushing a button on or near the power control. Autopilot behavior varies here, so know what your autopilot does. In general, though, assume that the autopilot disconnects, gives you a go-around attitude on the flight director if so equipped, and possibly reverts to HDG mode. Here’s your role:
Hit minimums and decide you’re missing. Hit the GA button if you have one, or disconnect the autopilot. Add power while pitching up (to the FD bars if so equipped). Keep the wings level; no miss requires an immediate turn. However, you might have a turn after just a bit, so be prepared to manually fly that.
Do what’s necessary to tell your navigator to keep sequencing from the approach to the miss. (With a GA button, this might be automatic, but you’d best know for sure ahead of time.) Select the appropriate NAV mode as needed—probably GPSS—and make sure your CDI is coupled to the right source. That step is critical and easily overlooked; if you were flying a ground-based approach, you’ll probably need to change the CDI from that VOR or LOC back to the GPS. Finally, make sure you’re in some kind of climb mode that’ll capture the selected altitude.
Don’t be in too big a hurry to do this. All these autopilot-setup tasks are secondary to flying the airplane, your first responsibility, of course. Once you’ve got things comfortably under control and stable, re-engage the autopilot and continue thinking ahead.
Back Course
There are enough nuances with a localizer back course approach even without adding an autopilot to the mix. But, adding the autopilot need not be a stress factor as long as you know how your autopilot handles things.
Your autopilot doesn’t care what it’s trying to follow; it’s just trying to keep the CDI centered. In general, if your CDI is drifting a bit off to the left, you must tweak your track over the ground to come left a bit to compensate. The autopilot does the same things.
When hand flying with an HSI (mechanical or eHSI), you should be in the good habit of always (always!) putting the front course under the OBS pointer. If you’re flying the back course, that OBS pointer is at the bottom of the instrument, thus inverting the whole left-right nature of the CDI. In this fashion, you always correct toward the needle, regardless of whether you’re flying a VOR, a localizer or a localizer back course.
Your autopilot, however, does not know about your heading relative to the OBS pointer, so there must be some way for you to tell it to correct in the needed direction—toward or away from the needle. Here’s where it gets tricky and you must know the behavior of your localizer receiver and your autopilot.
Some localizer receivers can sense when you’re on the back course, and even have an output to indicate the back course. If that exists, it might be connected to the autopilot to provide automatic back-course sensing to your autopilot. That’s two conditional statements, though. Know your system.
Let’s assume you don’t have this automatic sensing. The particulars vary with autopilot, but in general when you’re established on the localizer, you’ll select the correct approach mode. Sometimes there’s a discreet approach mode distinct from NAV mode. When there is, there might be a BC modifier so you’ve got to press both APPR and BC to fly the localizer back course. Or, BC might be its own mode and doesn’t need another.
It’s common for your VOR/LOC receiver to output a signal saying whether it’s receiving a conventional VOR signal or the more sensitive localizer signal. If your autopilot doesn’t have a separate APPR mode, it will be automatic—use NAV mode and the autopilot will detect the localizer signal telling it there’s higher sensitivity. The autopilot will usually indicate that it’s tracking a localizer signal, even from NAV mode. In this case, you then have to select the BC mode to tell the autopilot to correct in the opposite direction.
High Flyer?
Do you regularly fly in the flight levels, perhaps even with pressurization? Are you occasionally reminded of Payne Stewart and wonder if you could survive a pressurization (or oxygen) emergency at altitude? I do and I am. Here’s my technique to reduce the time needed for an emergency descent.
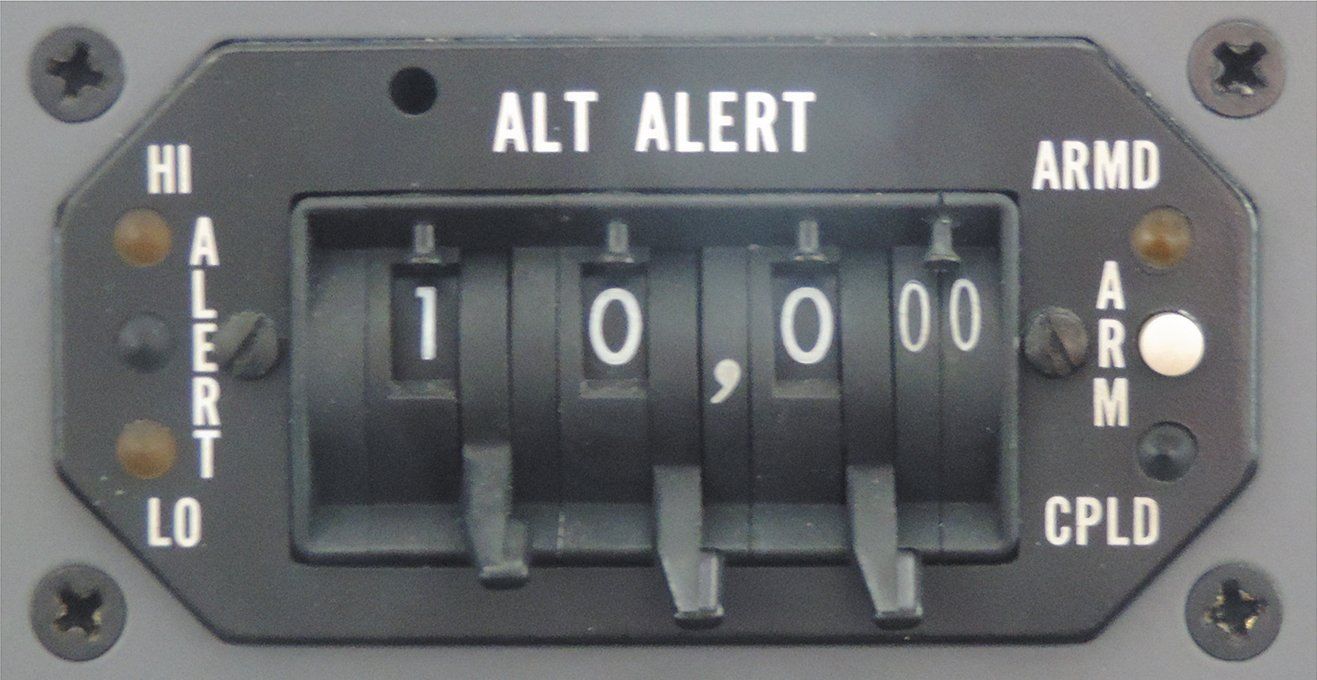
As part of my cruise checklist, after everything is set up and I’m stable at cruise, I’ll put 10,000 feet in the altitude preselector. Yes, this breaks my rule of not having anything in there that isn’t a cleared altitude, but this is a safety precaution to be used only in an emergency.
Should I experience a pressurization emergency, there are three quick steps I need to perform to begin an emergency descent: 1) deselect ALT hold mode. 2) Arm the already-selected 10,000-foot altitude. 3) Dial in a significant descent rate by rotating the pitch control a few spins nose-down. Once that’s done—it takes a second or two—the plane will descend to a breathable altitude and level off with no further intervention.
Sure, the altitudes where I fly still have a time of useful consciousness in minutes—compared to seconds in the upper 30s—so I’ll probably have plenty of time and this might be an unnecessary step. But, it’s a prudent one.
You might note that the Payne Stewart accident wasn’t thought to be a decompression at altitude. It was concluded to be a failure of the pressurization system from the ground. It never pressurized at all, which is a much more insidious condition to detect as there’s no dramatic failure. You just get sleepy. Because of this, part of my after-takeoff/climb check is to verify that the cabin is pressurizing, which is quite obvious after less than a thousand feet or so.
Of course, “It’ll never happen to me.” But if it does, I hope one of these two little precautions will save the day.
That’s All, Folks
That’s it. I’ve given you a lot of tips on using your autopilot for everything from routine tasks to the critically busy time on a missed approach. Next, we’ll shift gears a bit and take a look at the industry’s newest, most capable digital autopilots: the Garmin GFC 600 and the Genesys Aerosystems’ S-TEC 3100 in a direct, feature-by-feature comparison, flown in the same aircraft type.
Frank Bowlin can’t imagine busy IMC flight without a capable autopilot, although to keep his skills from completely disappearing, sometimes he doesn’t use it in the sim. Sometimes, when nobody’s watching…

Great Article, one thing I would like to add is FMA awareness (if you have FMA) its a great tools to help confirm what is selected on the Guidance Panel. The GP is what I’m asking for the Flight Mode Annunciator is what the aircraft is doing.
Great article, but as a former military pilot, airline check airman and life-long Instructor, I would never teach putting 10,000 feet in your altitude selector while at cruise simply because of a personal fear and negative transfer from Payne Stewart’s accident. May I suggest you have a quick donning O2 mask close at hand rather than violate an industry standard? Your procedure, my friend, is a personal technique and is a distractor to those who are developing and practicing sound industry standardized practices. I would suggest you go thru a medium and high altitude chamber class to know your personal hypoxia symptoms and to practice emergency descents rather than violate the design reason why altitude alerters were invented in the first place. I assure you, as a former examiner you would be given a pink slip for your personal technique.
Great article on autopilot tips. Once on the GP, I pre-set heading, altitude for the miss/hold, VS +800 fpm. I refresh the heading bug to my actual heading when 300′ above MDA. When I hit MDA, I press HDG ALT . George keeps me safe while I do power up, clean up. Then I press VS. I tell the navigator to un-suspend then press NAV GPSS and adjust VS as needed. Seamless
Good tip to always check HDG mode first when assigned a vector. I would add to always set your heading bug to your actual heading when in GPSS mode – so the change to HDG mode doesn’t start the plane turning an unexpected direction.